3D printing for astronomy: ASI294MC PRO camera to Star Adventurer adapter

Wide field astrophotography 

One area of astrophotography I really enjoy is wide field imaging. I started off doing wide field astrophotography with my micro four thirds cameras, the Olympus OMD-EM5, progressed to the EM1.2 and then the Panasonic GH5-S. The lenses used are primarily a manual focus Voigtlander 25mm or the Olympus 7-14mm PRO. Easy to set up and control but they need to be operated at high ISO settings and cannot compete with a dedicated astrophotography camera in terms of quantum efficiency and the ability to be cooled. With an ASI294 at my disposal, I started looking for options to use it with wide field lenses. I already had a number of vintage Olympus OM lenses that get used with my mirrorless cameras as well as a Canon FD 50mm f1.4 lens.


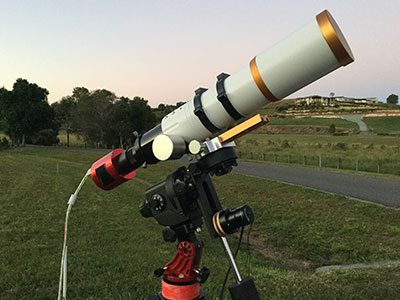
My light weight Star Adventurer mount is perfect for grab and go astrophotography, being designed for tracking with DSLR cameras, mirrorless cameras and small telescopes. It gets used with both my Panasonic GH5-S mirrorless camera and William Optics GT71 & ASI294 MCPRO colour camera. Attaching a mirrorless camera or telescope to the Star Adventurer is straightforward with a variety of existing mounting options available. Attaching the ASI294MC camera directly onto the Star Adventurer meant a custom made adapter had to be designed and fabricated. A perfect job for the QIDI X-Plus printer. All printed were made using PLA filament.

Configuring a wide field astrophotography setup using the ASI294MC PRO camera

The optical train consists of the ASI294MCPro colour camera and a vintage Canon FD 50mm f1.4 lens. Sitting in between the two is a M42 to MFT Mirrorless Camera Adapter and a FD – M43 adapter.

The Canon FD mount flange focal distance of 42mm
The individual parts of the ASI294MC adapter before assembly and gluing
3D printed parts prior to assembly
The Canon FD 50mm lens exposed to stray light and dew
Astrophotography gear ready for action

Additional 3D prints for the ASI294MC camera setup

A dew & light shield were also design and 3D printed using the QIDI X-Plus. The dew shield was then finished by smoothing the rough 3D printed surface with automotive spray filler and then further painted black. Navigating around the night sky with the Star Adventurer involves star hopping. To make the camera adapter more useful, a red dot finder part was designed and 3D printed and glued into place to be part of the final assembly. One thing with a red dot finder is always make sure it is turned off after use.

The dew shield being fabricated on the QIDI X-Plus 3D printer
QIDI X-Plus 3D printer and the dew shield being made
 
Assembled parts ready to mount on the Star Adventurer
Assembles parts ready to attach to the Star Adventurer
Completed 3D printed parts for the PoleMaster to M-Zero mount
A close up of the 3D printed adapter
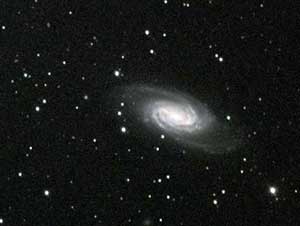
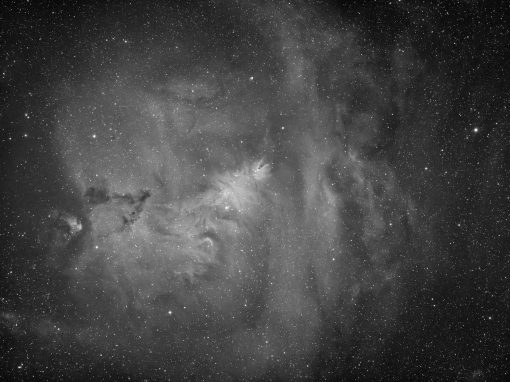
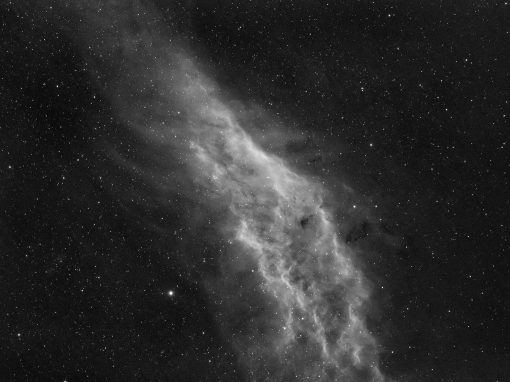
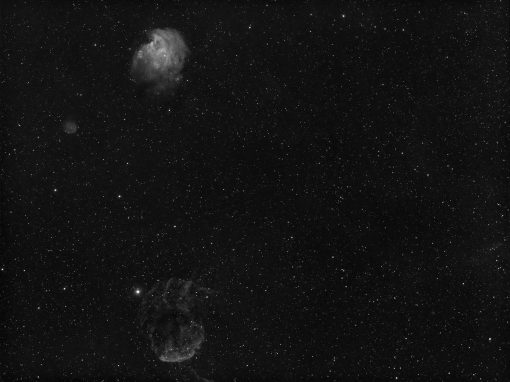
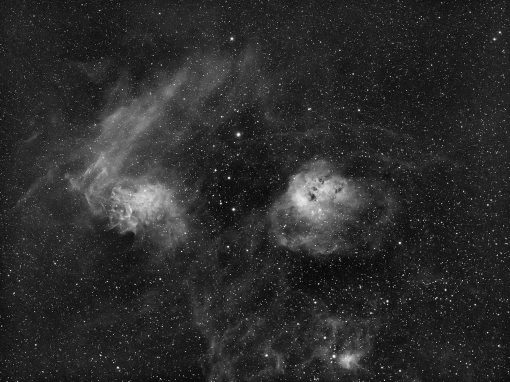
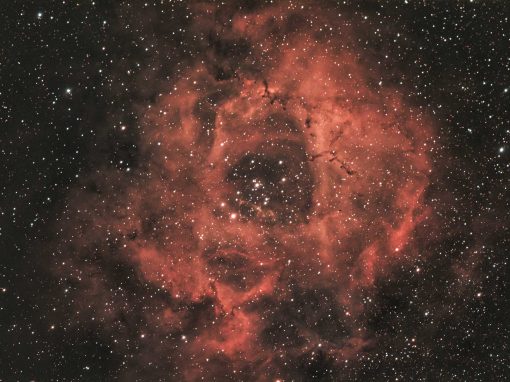
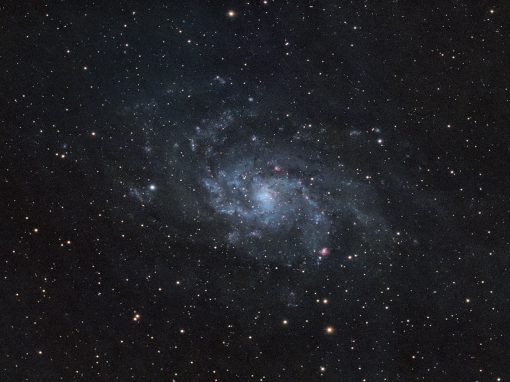
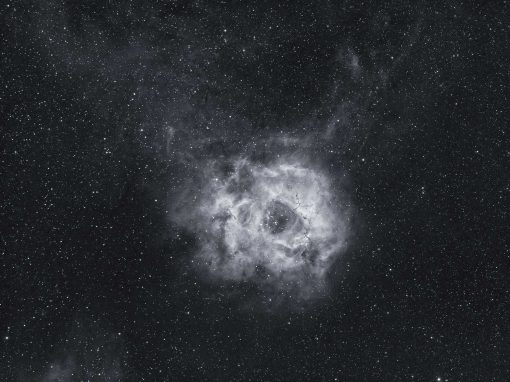
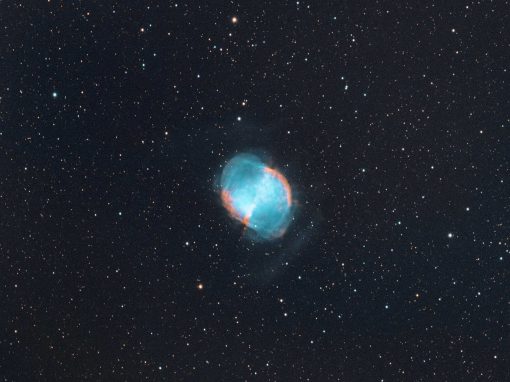
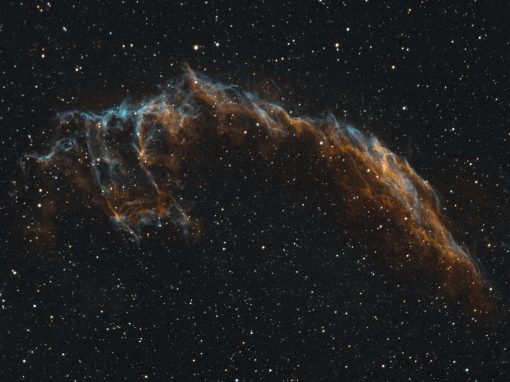
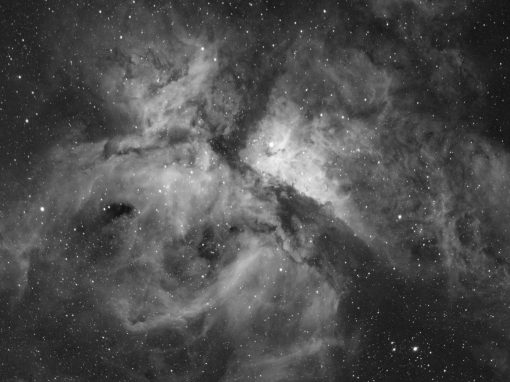
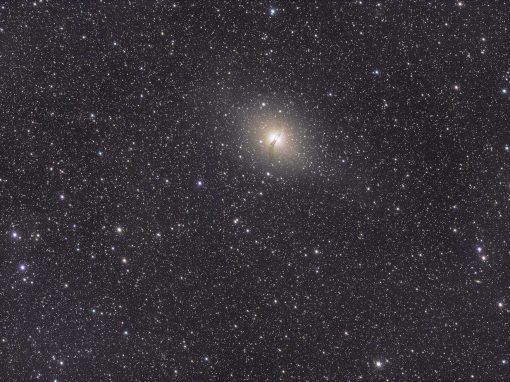
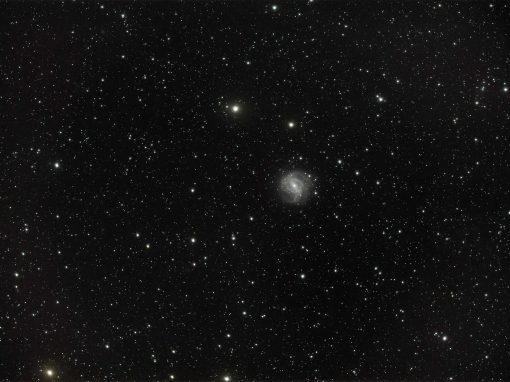
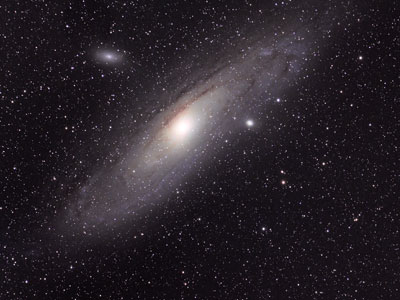
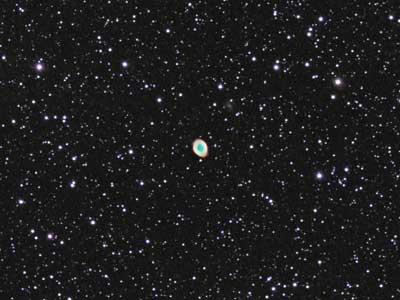
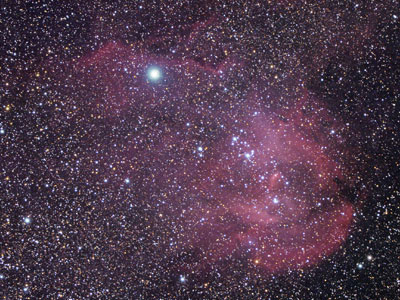
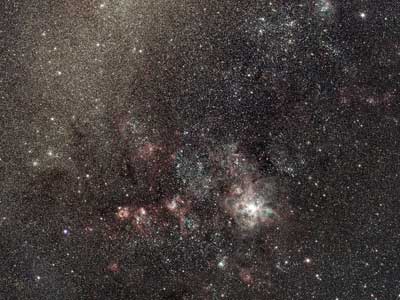
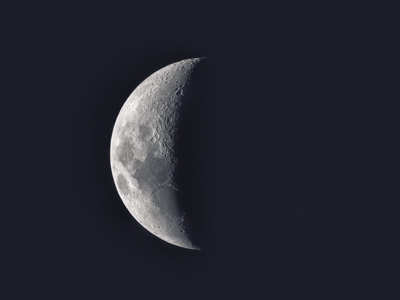
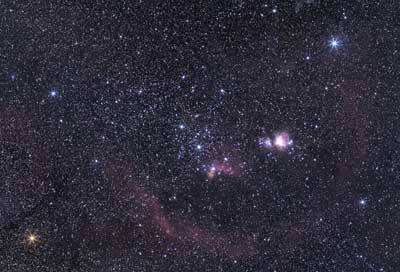
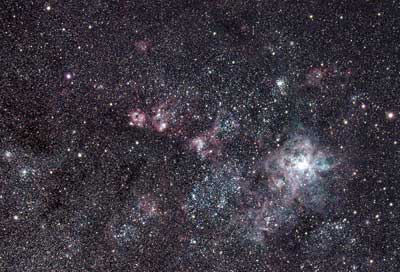
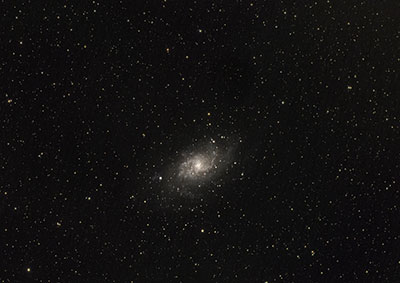
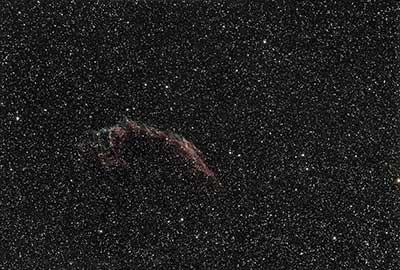
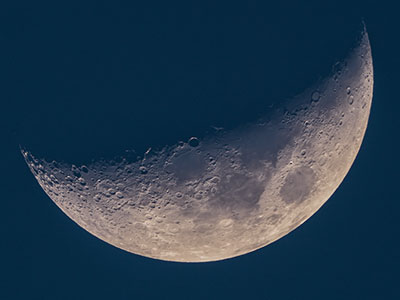
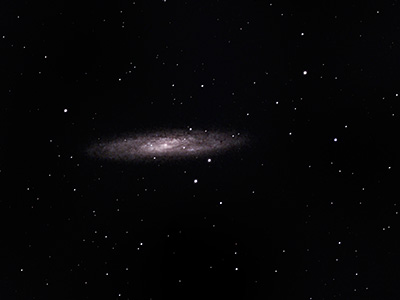
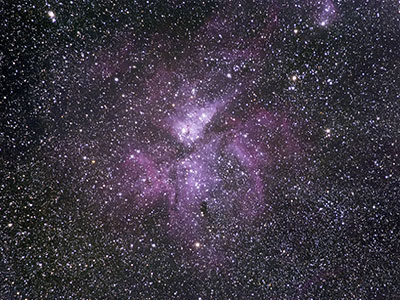
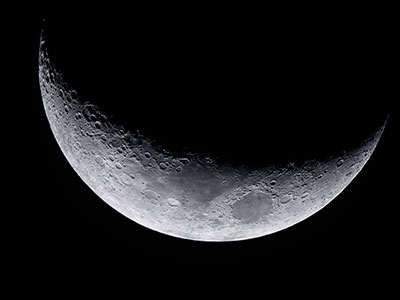
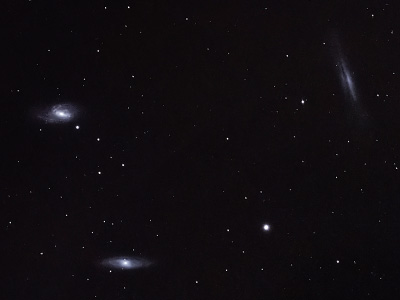
3D printing for astronomy : ASI294MC PRO camera to Star Adventurer adapter
Looking down the 3D printed dew and light shield

Updated 3D printed bracket for Orion 50mm guidescope

Improving the Orion 50mm guide scope adapterOne of the benefits of working in CAD software and then fabricating a functioning part using 3D printing is the ability to iterate and improve a design relatively quickly and easily. I first had the idea to move...

3D printed bracket for Polemaster to Avalon Instruments M Zero

PoleMaster  bracket part deux.This is an updated bracket to attach the PoleMaster polar alignment camera to the Avalon Instruments M Zero mount. The plan is to attach the 3D printed bracket to the bottom arm where the RA counter weights sit. Obviously this...

Changing the guide scope on the Avalon Instruments M Zero mount

New guide scope for the M-Zero mountI am looking to do longer exposures with the RASA8 using the IDAS NB1 Nebula Booster filter (up to 120 seconds). The plan is to use it in conjunction with the CEM40 mount with the Orion 50mm scope for guiding. Up till...

Configuring the M Zero mount for the Borg55FL

The Borg55FL on the Avalon Instruments M Zero mountHorizon to horizon imaging is possible when using the short focal length Borg refractor Configuring the M Zero mount for the Borg55FL Spacer rings for back focus The tilt adjuster ...

First light for the Borg55FL

Borg55FL first light with the ASI183MMWith the coming of the storm season in Brisbane plus a very busy work schedule there has been little opportunity to get the newly acquired Borg55FL under the night sky to do astrophotography. However, an unexpected...

Configuring the M Zero mount for the RASA8

The RASA8 on M Zero mount Using a drone battery with 3D print for counter weight Counterweight and guide scope setup RASA8 with clear optical filter RASA8 with optical filter removed RASA8 optical window removed IDAS RASA8 filter...

Configuring the M Zero mount for the William Optics GTF102mm f6.9 refractor

Testing the William Optics GTF102 on the M Zero mount The Avalon Instruments M- Zero mount can be configured to take a variety of telescopes by moving/flipping the L-shaped bracket that almost looks like a boomerang. To take the somewhat heavy GTF102mm...

3D printing for astronomy: ASI294MC PRO camera to Star Adventurer adapter

Wide field astrophotography  One area of astrophotography I really enjoy is wide field imaging. I started off doing wide field astrophotography with my micro four thirds cameras, the Olympus OMD-EM5, progressed to the EM1.2 and then the Panasonic GH5-S....

3D printing for astronomy: Attach a PoleMaster to Avalon Instruments M-Zero mount

Fabricate a PoleMaster to M-Zero adapterThe PoleMaster is a dedicated polar alignment device/camera from QHYCCD. I have been using it since it first came out and is one of the best astrophotography purchases I have made. Ease of use and polar alignment...

Virgo galaxy region wide field, Canon FD 50mm f1.4 & ASI183MM Pro

All you need is some time and patience, a cloudless night, a $50 vintage lens, a simple tracking mount and a camera. Sounds simple enough but not always achievable. The biggest variable, the weather finally played ball last night so I had the change to try out some...